Photogrammetry, or structure from motion, is an innovative photographic method for capturing detailed surface information of an object using digital photographs that is increasingly being used across archaeological subdisciplines in laboratory and field contexts. Since it relies on equipment that most archaeological projects already have, it can be relatively easy to learn and implement in field contexts. Ancient mortuary contexts pose particular ethical and conservation challenges that are well met by photogrammetry. There are at least four challenges to archaeological recovery of human skeletal remains that photogrammetry is well positioned to address.
1. Poorly Preserved Remains
The first challenge is adequately documenting bones and their context when preservation is poor. For example, the position of individual skeletal elements can reveal the original position of the fleshed body or provide clues as to whether the body was shrouded or placed among perishable material long since decayed (Wilhelmson and Dell'Unto Reference Wilhelmson and Dell'Unto2015). Additionally, detailed photographic documentation of bone surfaces may reveal pathologies not recognizable if bones deteriorate after excavation. Poor preservation also inhibits collection of metric data from skeletal remains, such as stature, which can be an important indicator of well-being (Wright and Vásquez Reference Wright and Vásquez2003).
2. Documentation of Complex Practices
The second challenge is adequately documenting human remains from cultures that have complex mortuary traditions. For example, the ancient Maya interred the deceased under house floors, under ballcourt alleys, in pyramids, and under plazas (Fitzsimmons Reference Fitzsimmons2009; Scherer Reference Scherer2015; Welsh Reference Welsh1988); therefore, skeletons are regularly encountered, and any archaeological research design and budget must account for excavating and curating human remains.
3. Remote Locations of Fieldwork
The third challenge in documenting and curating human remains is the often difficult conditions of fieldwork. Some archaeological sites are near modern towns with basic amenities like electricity, but many are not (Tokovinine and Estrada-Belli Reference Tokovinine and Estrada-Belli2017:20). Remote locations contribute to risks during excavation. For example, it may be more secure for archaeologists to remove a burial in one day so as not to leave it overnight and risk attracting looters. If the potential for theft, vandalism, or inclement weather requires the quick removal of a burial, it might not be cost effective to protect burial contexts from the elements with roofing or tarps. Many projects depend on field-school students for funding and labor. Depending on the situation, a skilled osteologist may not be documenting the entire burial context.
4. Time Constraints
A fourth challenge related to the fieldwork conditions is limited excavation time. Human remains may be encountered late in the project, when time and money have been dedicated to other pursuits. If excavations are remote or staff is limited, there may not be time to document or excavate human remains.
Bioarchaeologists working around the world face some or all of these challenges. Photogrammetry seems to be a technology that could address some of these issues. Photogrammetry software uses digital photos to create three-dimensional models that can be georeferenced and scaled. In a bioarchaeological setting, photogrammetry could produce scaled, 3-D models of skeletons in situ, from which metric data could be collected. Not only could excavators go back to these images if the remains deteriorate after removal, but also the entire context would be documented in 3-D for posterity. Photogrammetry is touted in the literature as easy to implement and inexpensive (e.g., Douglass et al. Reference Douglass, Lin and Chodoronek2015; Willis et al. Reference Willis, Koenig, Black and Castaneda2016) because it relies on digital photographs and because a wealth of open-source software exists to create the 3-D models.
This project assessed whether photogrammetry was an inexpensive technique that was also easy to learn and implement in the field. A further goal was to collect metric data from human skeletal remains using the resulting models. It was conducted at the ancient Maya sites of Say Kah and Chan Chich, both located in northern Belize, documenting three mortuary contexts.
PHOTOGRAMMETRY
Structure from motion (SfM) photogrammetry “is a new digital photography processing technique for capturing highly detailed, three-dimensional (3D) data from almost any surface using digital cameras” (Willis et al. Reference Willis, Koenig, Black and Castaneda2016:2). Basic workflow entails taking numerous overlapping photographs with a digital camera. The scene should be of a static object or context and consist of a natural texture. Reflective surfaces like glass do not model well and result in holes in the image. Further error can be caused by poor camera calibration and orientation, for example, when a photograph is taken at such an oblique angle that a large amount of foreground is included.
Homogeneity of the object or context's surface can also cause problems when aligning photos using software. If objects move when photographed, blurring results and hinders later alignment. Researchers documenting architecture have found that corners and seams between blocks were difficult to document (Sapirstein Reference Sapirstein2016; Willis et al. Reference Willis, Koenig, Black and Castaneda2016). Of course, care should be taken that images are in focus, as they cannot be successfully processed if they are out of focus. Including ground control points (GCPs) in each scene links the object or context to real space. These points can be recorded using a total data station or GPS (De Reu et al. Reference De Reu, De Smedt, Herremans, Van Meirvenne, Laloo and De Clercq2014; Koenig et al. Reference Koenig, Willis and Black2017; Willis et al Reference Willis, Koenig, Black and Castaneda2016:7).
The photographs are processed through software programs (many of which are open-source) such as COLMAP (Schönberger and Frahm Reference Schönberger and Frahm2016), Visual SFM (Wu Reference Wu2011), AliceVision (Moulon et al. Reference Moulon, Monasse, Marlet, Lee, Matsushita, Rehg and Hu2012), MicMac (Rupnik et al. Reference Rupnik, Daakir and Deseilligny2017), Bundler (Snavely et al. Reference Snavely, Seitz and Szeliski2006), Blender (www.blender.org), MeshLab (Cignoni et al. Reference Cignoni, Corsini, Dellepiane, Ganovelli, Ranzuglia, Scarano, De Chiara and Erra2008), MeshRecon (zhuoliang.me/meshrecon.html), OpenMVG (Moulon et al. Reference Moulon, Monasse and Marlet2018), MVE (Fuhrmann et al. Reference Fuhrmann, Langguth, Goesele, Klein and Santos2014), and PMVS (Furukawa and Ponce Reference Furukawa and Ponce2008). Proprietary software include Agisoft PhotoScan Professional (Agisoft LLC Reference LLC2018), ReCap Photo (https://www.autodesk.com/products/recap/overview), and 3DF Zephyr (www.3dflow.net/3df-zephyr). A free version of Zephyr will process only 50 photos, which renders it useless for most projects.
It is important to note that not every program offers the complete pipeline for creating a photogrammetry model. For example, VisualSFM completes the first step of aligning the photos and producing a sparse point cloud. The sparse point cloud must then be imported into a different program, like MeshLab or PMVS, to produce the 3-D model (Falkingham Reference Falkingham2016). Agisoft PhotoScan (Reference LLC2018) offers the complete process.
Photogrammetry software uses algorithms to align the camera locations by matching features shared in each photograph. It then triangulates shared points of each feature to generate a sparse point cloud, placing the object or scene in 3-D space (Douglass et al. Reference Douglass, Lin and Chodoronek2015). Once the photographs are aligned, the program implements image-matching algorithms to create even more points across the assembled photos, forming a denser point cloud. From the dense point cloud, a 3-D polygon mesh is created using pixel color and location. One measure of the accuracy of the colors rendered in the model is the number of polygon “faces” that the algorithm can create (Douglass et al. Reference Douglass, Lin and Chodoronek2015; see Table 1). At this point, the geometry of the model has been constructed, and the surface texture of the object or scene can be applied. In post-processing steps, the scale of the model can be established. Once the scale is established, measurements can be taken of objects within the model (Agisoft LLC Reference LLC2018; Shervais and Dietrich Reference Shervais and Dietrich2016). Images can be uniformly scaled and viewed in 2-D as orthophotos or digital elevation models (DEMs; Douglass et al. Reference Douglass, Lin and Chodoronek2015).
Table 1. Details of Burial Contexts and Photos Taken at Chan Chich and Say Kah.

Archaeological projects in diverse locations implement photogrammetry and 3-D scanning for documenting architecture (Galeazzi Reference Galeazzi2016; Sapirstein Reference Sapirstein2016; Tokovinine and Estrada-Belli Reference Tokovinine and Estrada-Belli2017) and artifacts (Porter et al. Reference Porter, Roussel and Soressi2016; Shott and Trail Reference Shott and Trail2010). Biological and forensic anthropologists also make frequent use of photogrammetry to document skeletal elements and contextual data, including integrating it with other technologies like CT scanning (Katz and Friess Reference Katz and Friess2014; Mickleburgh and Wescott Reference Mickleburgh and Wescott2018; Parsons and Harrod Reference Parsons and Harrod2017; Villa et al. Reference Villa, Flies and Jacobsen2018). Three-dimensional models not only preserve information but also can provide new information not originally seen during excavation. For example, Wilhelmson and Dell'Unto (Reference Wilhelmson and Dell'Unto2015) integrated 3-D modeling and GIS to conduct a detailed spatial analysis of two mortuary contexts excavated on the Baltic island of Öland. Two skeletons were excavated within a house in a ring fort dating to approximately AD 460 to 490 (Wilhelmson and Dell'Unto Reference Wilhelmson and Dell'Unto2015:307). The researchers documented anatomical representation, fracture patterns, and necrodynamics (movement of the bones during decomposition) using georeferenced photographs and GIS. Perimortem sharp force trauma suggest that the individuals were likely killed and left to decompose where they fell (Wilhelmson and Dell'Unto Reference Wilhelmson and Dell'Unto2015:318). Spatial analysis of dry-bone fracture patterns in a georeferenced 3-D model suggested that the roof collapsed on the individuals, indicating that the ring fort may have been abandoned (Wilhelmson and Dell'Unto Reference Wilhelmson and Dell'Unto2015:312). Excavators returned to test this hypothesis and uncovered two dozen more individuals whose bones show perimortem trauma and in situ decomposition (Alfsdotter et al. Reference Alfsdotter, Papmehl-Dufay and Victor2018). Studying the 3-D model revealed details about body position that influenced future excavations. Detailed documentation of whole skeletal elements before excavation revealed critical taphonomic details.
Poor preservation of skeletal material results in most of the bones falling apart once they are taken from the ground. Documenting element presence and articulation in a high-resolution image before removing the bones from the ground would address this issue. Even more important is creating an opportunity to review the context during post-excavation analysis. As Wilhelmson and Del'Unto (Reference Wilhelmson and Dell'Unto2015) noted, it was helpful to reassess in situ presence and articulation as bones are being analyzed in the lab for other taphonomic attributes, such as fracture type (e.g., green or dry bone) or rodent gnawing (e.g., different types of rodents gnaw at different stages of decomposition), can provide a wealth of unprecedented information. It is possible that anthropometric data that are typically difficult to collect after excavation due to poor preservation, such as long-bone measurements used to estimate stature, could be collected from 3-D models in Agisoft PhotoScan Professional (Reference LLC2018). Poor preservation is also addressed, as the technique can be done relatively quickly in the field. Exposure of fragile bones to the tropical environment contributes to their poor preservation. If a context consists of multiple individuals, documenting complex stratigraphy, photographing, and drawing can take days compared to the relatively expedient nature of SfM.
MATERIALS
Although photogrammetry works well in controlled environments, the greatest challenges come in the field. The goals of this project were to build 3-D models and attempt to collect metric data to estimate stature. Three different contexts were excavated in the summer of 2017, and the method was implemented at each. Because funding is always tight on archaeological projects and one field site was relatively remote, minimal extra field equipment was purchased (Table 2). Lighting, in particular, was likely to be as issue, so two portable LED lights by Fotodiox were purchased.
Table 2. Equipment and Price List for In-Field Photogrammetry.

*Purchased new for this study.
**Not used in this study.
Agisoft Photoscan Professional was purchased to run on a 2015 MacBook Pro. I opted to use the field camera I already owned and knew how to operate, a Canon Powershot G15. It has a 35 mm equivalent lens and a 12.1 MP CMOS sensor. A second reason for using the G15 is that it is small; grave spaces are typically small and can be difficult to photograph with a bulkier camera and lens, such as a Canon EOS 5D Mark IV or a Nikon D90 (see Galeazzi Reference Galeazzi2016; Porter et al. Reference Porter, Roussel and Soressi2016). A 1 terabyte hard drive was purchased in anticipation of needing a large amount of space for storing hundreds, and eventually thousands, of photographs and the resulting models. All gear is battery powered.
One issue with photogrammetry is that it is impossible to know whether enough overlapping photos were captured to document the context until the sparse point cloud is created. This is problematic in archaeology, as the excavation process is destructive. The MacBook Pro was carried to the distant field site every day so that photographs could be imported and a low-resolution sparse point cloud could be built to ensure sufficient photographs were taken. The Chan Chich excavations were less than five minutes from the project lab, so I intermittently went there to build the low-resolution models.
CONSIDERATIONS FOR IMPLEMENTING PHOTOGRAMMETRY IN A BIOARCHAEOLOGICAL CONTEXT
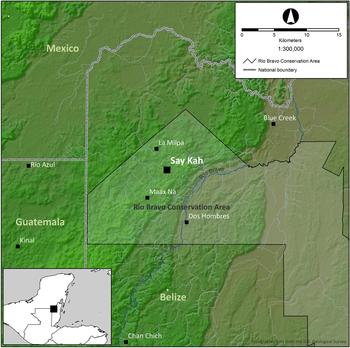
The following provides a step-by-step guide to implementing photogrammetry in field contexts to ensure documentation of poorly preserved, complex mortuary deposits. The issues that are highlighted are of explicit concern to the documentation of mortuary excavations. In the cases described here, the fieldwork conditions were relatively good—access, security, and time constraints, while not optimal, were manageable. Inclement weather was a constant concern. Three burials were documented using photogrammetric techniques at two excavations in the Maya Lowlands of northern Belize, Say Kay and Chan Chich (Figure 1).

FIGURE 1. Map of the northern Maya Lowlands showing sites mentioned (map created by Joshua Wright).
Details of each context are given in Table 1, and the graves are depicted in Figures 2–4. Say Kah 3, the interment of a child, was placed in the southwest corner of a room directly in subfloor construction fill (Novotny Reference Novotny, Jackson and Brown2017; Figure 2). The second context, Say Kah 4, was the interment of an adult in a subfloor stone cist (Novotny Reference Novotny, Jackson and Brown2017; Figure 3). The third context was CC-B16B from Chan Chich. It consisted of a large rectangular crypt containing three adults, with the principal individual placed in the southern half of the crypt and a cranium atop a pile of long bones in the southwest corner (Gallareta et al. Reference Gallareta Cervera, Houk, Palmer, Houk and Novotny2017:47; Novotny et al. Reference Novotny, Booher, Aquino and Houk2016; Novotny et al. Reference Novotny, Gallereta Cervera, Smith, Kilgore, Houk and Novotny2017; Figure 4).
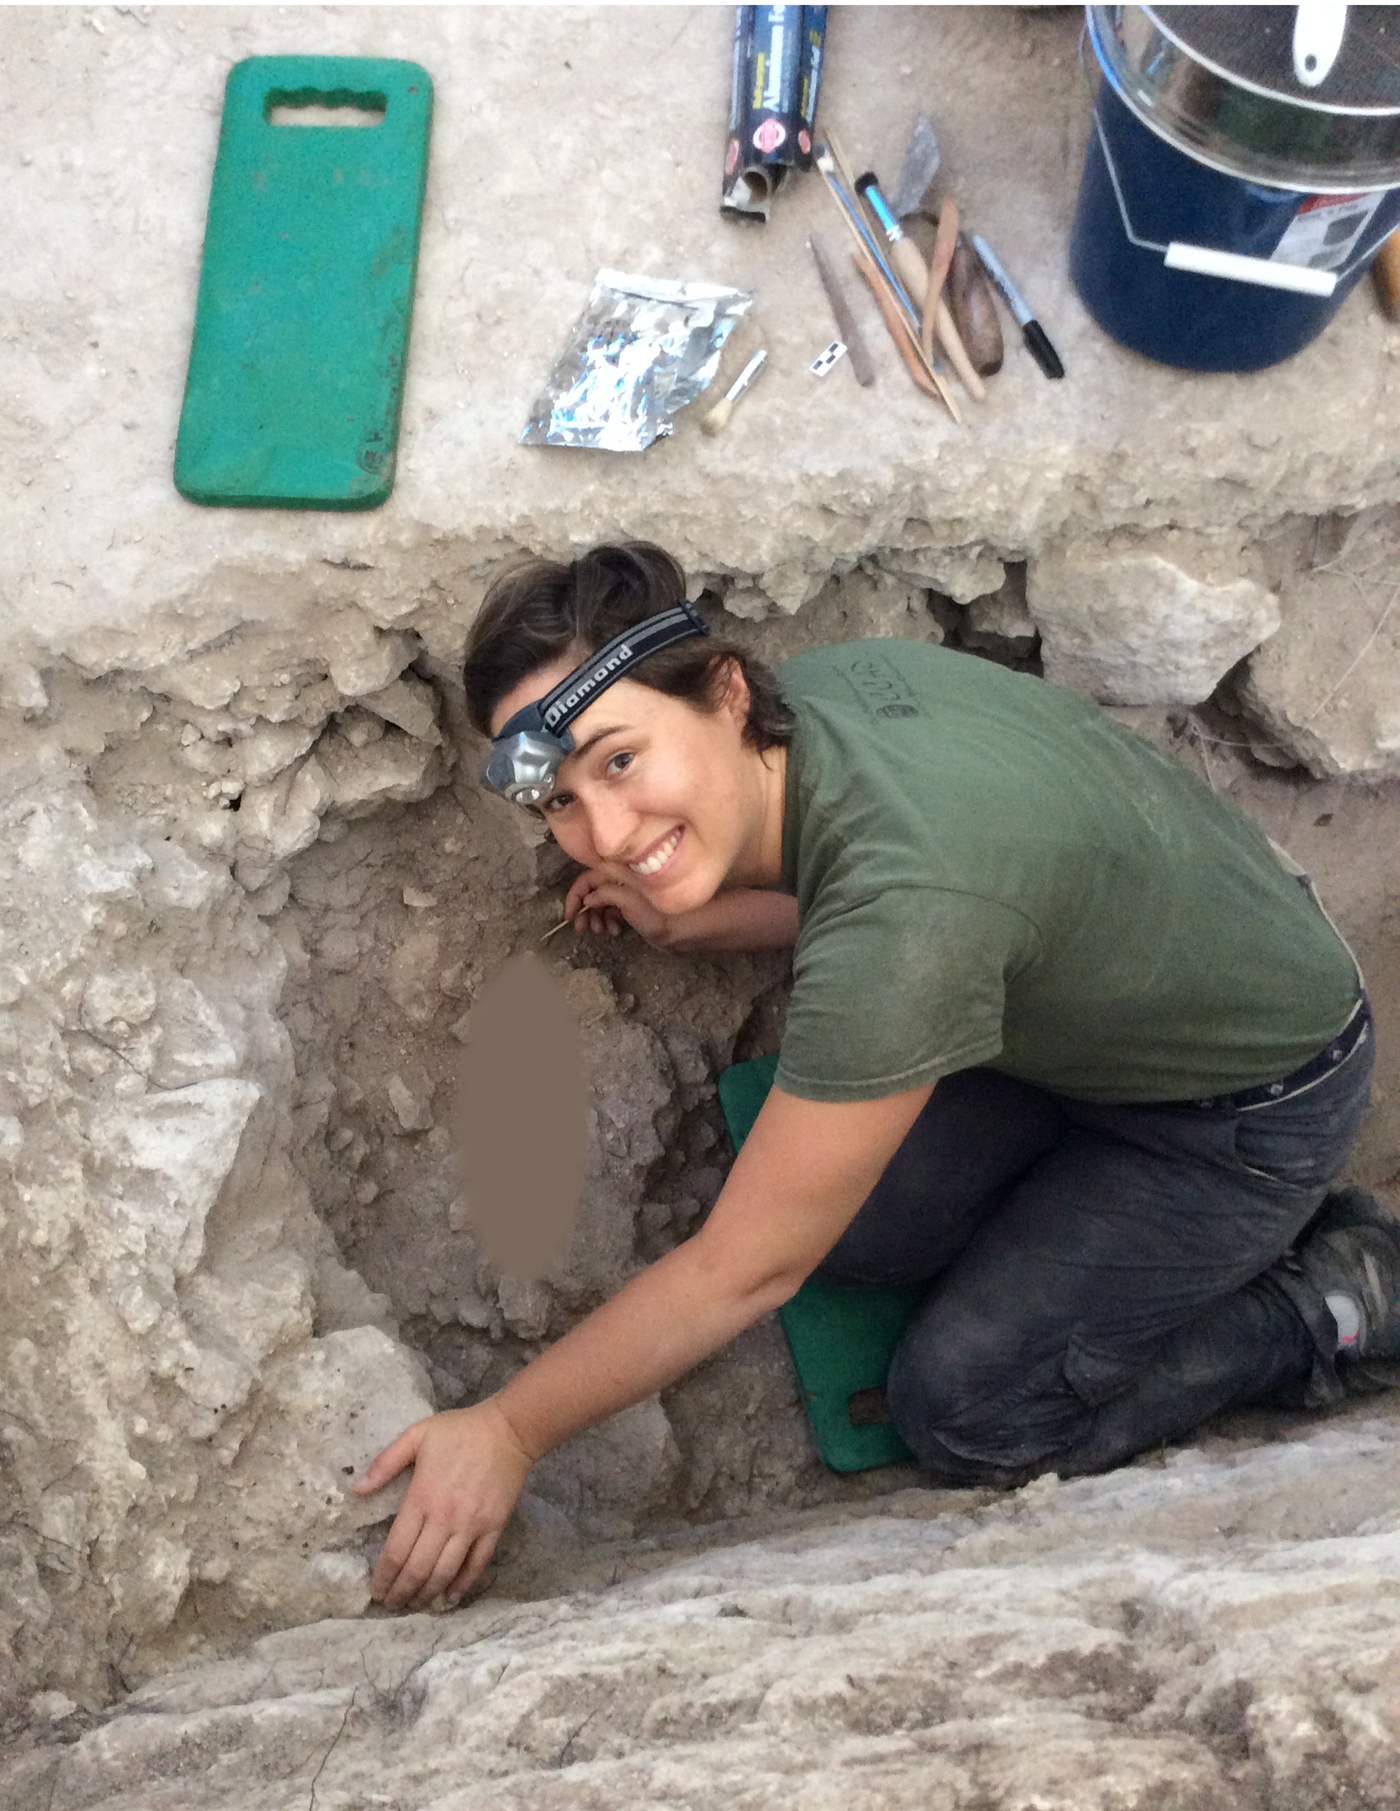
FIGURE 2. Say Kah 3 context during excavation. North is toward the top of the photograph. Image modified to obscure human skeletal remains. (Photograph courtesy of the Say Kah Archaeological Project.)
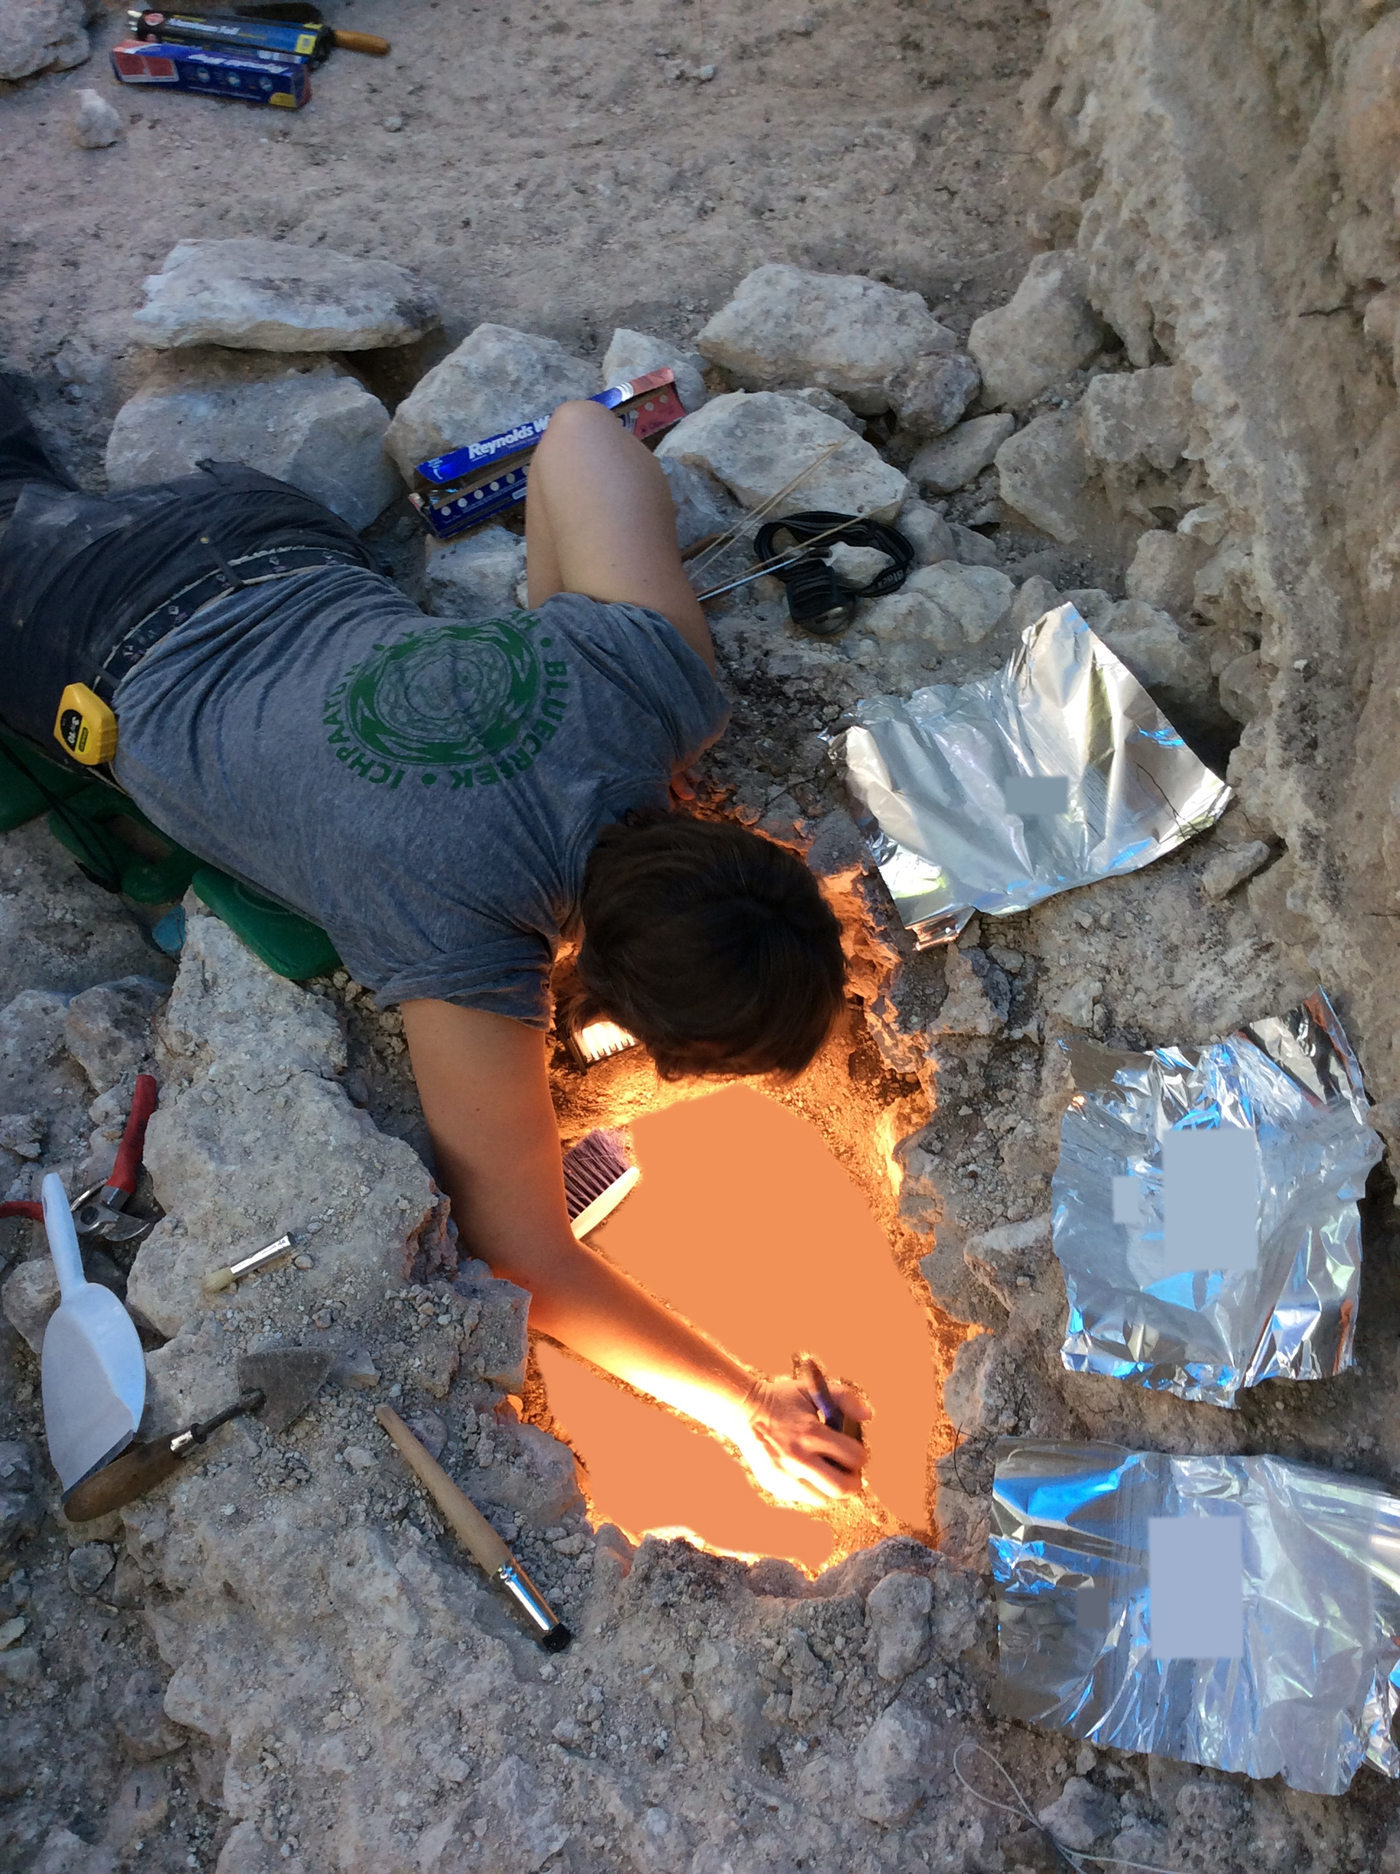
FIGURE 3. Say Kah 4 subfloor cist during excavation. North is toward the bottom of the photograph. Image modified to obscure human skeletal remains. (Photograph courtesy of the Say Kah Archaeological Project.)

FIGURE 4. CCB16B crypt after excavation. North is toward the left side of the photograph. The skeletal remains were located along the southern edge of the crypt and in the southwest corner. Image modified to obscure human skeletal remains. (Photograph courtesy of the Chan Chich Archaeological Project.)
These steps assume the standard excavation procedure of uncovering an entire skeleton before documentation and removal. This is not strictly necessary; nevertheless, these steps cover the basic method and can be applied in a number of field situations.
Step 1. Practice and Prepare before Implementing Photogrammetry in the Field
Falkingham (Reference Falkingham2016) and Mallison (Reference Mallison2013a, Reference Mallison2013b) maintain very helpful blogs on photogrammetry methods. Falkingham regularly tests open-source photogrammetry software, and Mallison has specific commentary on equipment and methods. Practice taking photographs prior to excavation, either before the field season or after arriving at a field site where approximate excavation conditions exist. By far the most difficult part of the process is ensuring that the photographs are numerous and well exposed (Mallison and Wings Reference Mallison and Wings2014). To practice, photograph a plastic skeleton in various light conditions, and import and align the photos in the software of your choice. As with any excavation planning, assess what additional equipment you may need to make good photogrammetric models in the field (Table 2). Depending on lighting and space constraints, multiple tripods and additional telescoping rods may be necessary (i.e., Porter et al. Reference Porter, Roussel and Soressi2016).
Step 2. Assess Direction and Intensity of Natural Light
Intensity and quality of natural light will dramatically affect results (Galeazzi Reference Galeazzi2016). As burial excavation progresses, assess the available light, and take preliminary photos at different times of day. The Say Kah and Chan Chich excavations took place in the forest at the beginning of the rainy season. Dense foliage blocked the sun or created dappled light on the excavations. Both excavations were covered with tarps to protect them from rain. Consider planning to remove tarps or other shelters when ready to photograph. Alternatively, experiment with additional lighting.
Step 3. Assess the Space Needed for the Photographer and Equipment
Consider the space available to photograph. The burials at Say Kah, in particular, were very limited in space (Table 1; Figures 2 and 3). Say Kah 3 could only be photographed from the north and the east. The slope of the burial fill and proximity to the west and south walls made it impossible to take usable photos from all angles. The camera did not fit between the bones and the north wall, so an adequate depth of field could not be maintained. The stone cist surrounding Say Kay 4 was too small to hand-hold the camera and place additional lights. In this context, it would have been useful to mount the camera on a telescoping rod or a tripod and use a remote trigger to take the photographs (Willis et al. Reference Willis, Koenig, Black and Castaneda2016). CC-B16B at Chan Chich photographed well, in part because there was more space and fewer architectural features blocking the natural light.
Step 4. Set Up Necessary Equipment and Ground Control Points
Establish the location and angle of any artificial lighting and the location of the camera. Place a north arrow and at least three GCPs to make a scaled model (De Reu et al. Reference De Reu, De Smedt, Herremans, Van Meirvenne, Laloo and De Clercq2014). GCPs should be visible in more than one photograph, so placing more than three is preferable (Willis et al. Reference Willis, Koenig, Black and Castaneda2016:7). Take total data station points or use a hand-held GPS to take coordinates of each GPC. Agisoft PhotoScan Professional can then georeference and scale the resulting 3-D model. It is possible to measure objects in the model by setting a scale manually, but this is less accurate.
Some practitioners use small stickers that the software can easily identify (Mallison Reference Mallison2013a). No stickers were used for this project, but they would come in handy if taking photos in batches. For instance, you could choose to excavate, photograph, and remove elements as they are exposed rather than exposing the entire skeleton, then documenting, then removing. The stickers ensure that the software can stitch together each batch of photos to produce a single model.
Step 5. Take Clear and Overlapping Photographs
There are two important considerations: first, that the photographs are not blurry and have a consistent depth of field and, second, that they overlap the subject sufficiently (Cultural Heritage Imaging 2015). “Depth of field” refers to the parts of the image that are in focus. If the depth of field is too shallow, then a significant amount of the background will be blurry, and the software used to create the 3-D models will not be able to match points across photos (Mallison Reference Mallison2013b). The result is a blurry model. The goal is to create photographs with the maximum depth of field given the light available and space constraints. Depth of field is principally controlled by adjusting the F-number on the camera. It is also affected by the lens and the distance between the camera and the object. The F-number is the width of the lens aperture, and that width affects how much light gets to the sensor. To create a broad depth of field, use a larger F-number for a smaller aperture, which will likely mean leaving the shutter open for a longer period, which requires a tripod (Porter et al. Reference Porter, Roussel and Soressi2016:75).
The photographs need to overlap (Cultural Heritage Imaging 2015). That is, at least three points must be present in multiple images (De Reu et al. Reference De Reu, De Smedt, Herremans, Van Meirvenne, Laloo and De Clercq2014) As noted above, 3-D modeling software looks for common points in each image and creates polygons based on these points. If photos do not overlap, then there will be missing data, producing blank spots in the image.
Step 6. Check Photographs for Quality and Overlap
As part of the in-field workflow, a laptop computer was brought to the excavations so that photos could be imported and a preliminary sparse point cloud could be generated. The point cloud showed whether there was sufficient overlap of photographs, and it allowed viewing the photos on a large screen. Importing photos in the field was less useful as I gained experience with photography, but it was initially helpful. Photographs should be assessed every evening (e.g., De Reu et al. Reference De Reu, De Smedt, Herremans, Van Meirvenne, Laloo and De Clercq2014).
Step 7. Build a 3-D Model
The final step is to build a 3-D model. Douglass and colleagues (Reference Douglass, Lin and Chodoronek2015:141–143) provide a detailed description of data processing using Agisoft PhotoScan. Shervais and Dietrich (Reference Shervais and Dietrich2016) and Mallison (Reference Mallison2013a; Reference Mallison2013b) developed useful step-by-step guides to produce 3-D models, including further pre- and postprocessing of images and managing GCPs.
DISCUSSION
The aim of this project was to assess whether a bioarchaeologist with basic photography training could implement photogrammetry in a field setting. The hypothesis was that photogrammetry could address common challenges to bioarchaeology: documenting poorly preserved skeletal remains—often under threat of poor weather, looting, or dwindling excavation time—recovered in complex deposits potentially of multiple individuals within variable grave architecture. Implementing photogrammetry in the field to document human remains was not simple, but it is a useful tool for any bioarchaeologist if the context and equipment are right. The real skill in creating good models through photogrammetry is taking many well-focused, adequately lit photos. Managing the quality of light given the small grave spaces was the most challenging aspect.
Of the three contexts excavated, the photographs for only one, CC-B16B at Chan Chich, were high enough in quality to make an adequate 3-D medium-resolution model. The natural light in the Chan Chich crypt excavation was much better than in the Say Kah excavations, and there was no need to use the Fotodiox lights for the final photographs. While the natural light allowed high-resolution photos, the corners of the crypt, where there were additional human remains, were quite dark and did not photograph well. Equipment designed to produce high-resolution images in low-light scenes would have been helpful.
To minimize the amount of gear necessary to support artificial lighting (lights, multiple tripods, material to provide reflection, etc.), purchasing a camera that performs well in low-light conditions, such as a Nikon D750 FX or a Sony Alpha a6300, may be a good investment. Advantages of the Sony Alpha include that it has a sensor twice as large as the Canon Powershot G15 I used (23.5 mm x 15.6 mm Sony Alpha sensor vs. 7.53 mm x 5.6 mm Canon G15 sensor) and is mirrorless, so it is small, which would be helpful when photographing a grave space.
One critical mistake was not placing adequate ground control points to create a scale model from which to collect metric data. Instead, the “ruler” tool in PhotoScan was used to scale the model according to a meter stick. To test the measurement capabilities, I measured the diameter of the ceramic vessel in PhotoScan that was also measured in the field as 8.5 cm. Measuring from the same points as the excavator, I obtained a measurement of 8.4 cm. Closer attention to GCPs recorded with a total data station or GPS would have anchored the model in real space and allowed greater measurement accuracy. In addition, the position of the lower limbs prevented the collection of any data on stature from CC-B16B. CCB16-B was placed in an extended supine position with the right ankle crossed over the left. The most accurate measurements, on the posterior aspect of the femora and the anterior aspect of the tibiae, were not visible (Wright and Vásquez Reference Wright and Vásquez2003:238, 244). Landmark visibility was further constrained by the lack of preservation of the epiphyses. The approach would still be useful in contexts where the body was positioned without the ankles crossed, in a prone position, or disarticulated. Although this project was not successful in collecting metric data, photogrammetry holds potential for collecting this type of data from in situ skeletal remains. Additionally, with better lighting, information on pathology and taphonomy could have been collected (e.g., Wilhelmson and Dell'Unto Reference Wilhelmson and Dell'Unto2015).
While time was not a major constraint for the excavations discussed here, photogrammetry was reasonably quick to implement, certainly faster than making a line drawing of a burial context. The ability to add scale bars and georeference the 3-D models means that in circumstances when drawing may be impractical (e.g., when thunderstorms or looting are concerns), a context can still be thoroughly documented. It would be easy to teach photogrammetry to a student or someone without formal osteological training (also see Freiwald Reference Freiwald2019, in this issue).
Limitations include upfront costs associated with purchasing software, computing time, and long-term curation of large files. Agisoft PhotoScan Professional costs $3,500, which might be prohibitively expensive for contract firms or museums; however, an education discount reduces the price to $550. There are open-source software options, as noted above, and these have been successfully implemented in the documentation of mortuary contexts (Ducke et al. Reference Ducke, Score and Reeves2011; Green et al. Reference Green, Bevan and Shapland2014; Mickleburgh and Wescott Reference Mickleburgh and Wescott2018). Photogrammetry generates large amounts of data that require computing time, sometimes overnight depending on the computer processing speed, memory, and graphics card (De Reu et al. Reference De Reu, De Smedt, Herremans, Van Meirvenne, Laloo and De Clercq2014). The Agisoft PhotoScan manual (Agisoft LLC Reference LLC2018) states that it works best on a computer with at least an Intel i7 processor, and other factors such as RAM and graphics or video card capability are critical considerations.
CONCLUSION
The goal of this project was to assess whether photogrammetry was easy to learn, cost effective, and easy to implement in the field in hopes of addressing challenges to excavating human remains when poor preservation, complex contexts, and unpredictable field situations require quick excavation, possibly without an expert. The technique was easy to learn, taking only a few days of practice to understand the process for taking photographs to create a good model. Learning the post-processing workflow—including how to import and edit photographs in PhotoScan and to make a basic model—was also easy. Having an adequate strategy for making photographs in small, dark spaces was by far the most challenging aspect but could be mastered with more practice and the correct tools. Poor preservation and less-than-ideal excavation contexts pose challenges to the ethical excavation and subsequent conservation of human skeletal remains. These are challenges that must be addressed by bioarchaeologists no matter where they work. Toward that end, photogrammetry is a productive and, perhaps, essential addition to the bioarchaeologist's toolkit.
Acknowledgments
I would like to thank the Institute of Archaeology in Belize for permission to excavate at Say Kah and Cahal Pech. I am grateful to the project directors, Dr. Sarah E. Jackson and Dr. Linda A. Brown at Say Kah and Dr. Brett A. Houk at Chan Chich, for the opportunity to work on their projects. Archaeological excavation was made possible by Texas Tech University, a National Geographic Foundation grant to Dr. Jackson and Dr. Brown, and a grant from the Alphawood Foundation to Dr. Houk (TTU Award No. A16-0103-001). Special thanks to Mark Willis for advice with photography. My thanks to Briana Smith, who assisted burial excavation at Chan Chich, and to two anonymous reviewers whose comments and suggestions greatly improved this paper.
Data Availability Statement
All data discussed in this manuscript, including 3-D models and images of human skeletal remains, are available to the public for research purposes through the Texas Tech University Department of Sociology, Anthropology, and Social Work.